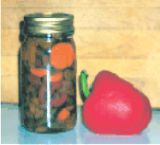
Canning is very easy but the most technical method of preserving because there is a greater chance of spoilage if not done correctly. The subject is much too involved to be thoroughly covered on this page. Processing methods and times vary depending on the ingredients, size of jars and even the altitude where you live. Water canners are adequate for high-acid foods, but pressure canners are necessary for low-acid foods. How the foods are packed in the jars is also a factor. Every recipe refers to head space, which is the amount of space necessary in the jar for expansion when heated. To be certain you have the correct amount, fill the jar to the recommended depth, then remove air bubbles by sliding a rubber spatula between the glass and food. You will see the bubbles rise to the top as the liquid fills in any air space. That usually changes the depth of the food, which needs to be readjusted to the correct head space. Always wipe jar rims with a clean damp cloth to remove any food particles or liquid before placing lids on top. All of this must be done as quickly as possible so the jar and its contents remain hot. In some cases, where processing time is less than 10 minutes, jars must be heated in boiling water for a specified amount of time before filling to sterilize them. As you can see, it is important to adhere to the recipes, study the information on the sites mentioned above and follow the manufacturer's directions that come in the box of canning jars. If you do that, your efforts will be well-rewarded. Although there are numerous foods that can be canned, my favorites are tomatoes or tomato-based products, pickles, relishes and jams. The recipes below include processing times based on guidelines provided by the USDA National Food Safety Database.
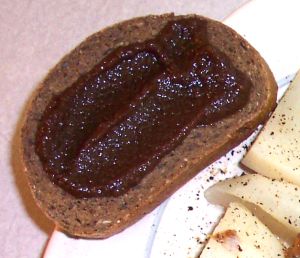
Any of the pickled recipes, as well as the apple butter, can be placed in jars or containers and refrigerated for several months without the canning process. Alternately, the tomatoes and rhubarb can be frozen.
In most cases, freezing can be used in addition to, or in place of, canning. As with all preservation, the produce must be very fresh and frozen as soon after harvest as possible. Keep in mind that, frozen correctly and maintained in the proper temperature, foods do not spoil in the sense that they carry harmful bacteria. The quality will deteriorate if frozen for too long a period, so check the charts for shelf life recommendations. Before you plan to freeze, make certain that the freezer is in good working condition and that you have enough freezer space so that there is adequate air circulation. Foods must be packed in air-tight freezer bags or containers and organized in such a way that there is some air space on each shelf. Always allow some head space in the container for expansion during freezing. Don't forget to label the package as to content and date.
Preparation before freezing depends on the type of produce. Of course, it all needs to be cleaned just like you would do prior to eating. Some items need to be blanched and others can be frozen raw. The following are preparation guidelines for the fruits or vegetables I freeze most often. Others can be found by using the search box.
Fruits: Most fruits can be frozen raw. Small whole fruits and berries can be frozen as is. Place in a single layer on a baking sheet in the freezer until frozen, then pack into air-tight freezer bags. Some fruits will benefit from a sugar syrup. Soft sliced fruits will make their own syrup if sprinkled with a little sugar before freezing to allow the juices to draw out and dissolve the sugar. For whole or dryer fruits, make a syrup using 1 part sugar to 4 parts water for light. Increase the sugar for heavier syrups. Fruits such as apples, peaches, pears and apricots discolor quickly when frozen and can lose flavor when thawing. They should be mixed with some ascorbic acid (Vitamin C), which is available in most grocery stores that have freezing items. Lemon juice can also be used, but is not as effective and will add its own flavor to the fruit. Fruits that will be cooked when used can be steamed before freezing. Steam just until hot, cool and freeze. Tomatoes, which are a fruit, can be frozen raw or cooked, depending on the intended use. Either way, they are only suitable for cooking after freezing as they will lose their firmness. Raw cherry tomatoes can be frozen whole. Larger tomatoes can be frozen whole or cut into wedges. If desired, remove the seeds and squeeze out the excess juice. Proceed as stated above for whole berries. Cooked tomatoes can be frozen in any preparation, such as those listed in the canning recipes.
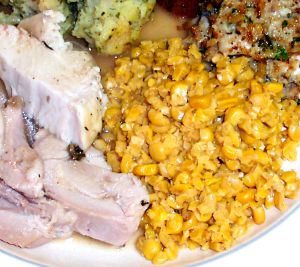
Vegetables: Any vegetable can be frozen, but most require some cooking time before freezing. The cooking method used is blanching. Water blanching is accomplished by placing the vegetables into boiling water for a short time, depending on the type and size of the product, then removing and placing in cold ice water to stop the cooking process. Steam blanching is also done to preserve more of the nutrients, but takes a little longer since the vegetables are cooked over the boiling water. An alternate method of steam blanching is the use of the microwave. Place the vegetables in a large bowl or baking dish with just a little water and then cover tightly with plastic wrap. After blanching and cool down, the vegetables should be well-drained before placing in bags or containers. Vegetables which can be frozen raw are peppers, scallions and most herbs.
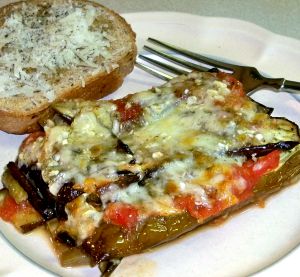
Casseroles: One of the advantages to freezing is that the busy cook can prepare and assemble casseroles made from fresh vegetables in season to be used throughout the year. I have listed a few of my favorites below. Most can be frozen before baking since the ingredients are precooked before assembly, but can also be frozen after baking. One exception is the stuffed green peppers, which should be baked prior to freezing. If a casserole is frozen when placed in the oven, bake in a preheated 350° F oven for about 40 minutes covered, then 10 to 20 minutes uncovered or until hot and bubbly.
Dehydration is one of the oldest methods of food preservation. Long before modern appliances, man dried food using the heat of the sun, the wind and smoking fires in order to sustain life when fresh foods were not available. Dehydration is the process of removing water from food by circulating hot air through it, prohibiting the growth of enzymes and bacteria. There are a number of benefits to dried foods. First, they are tasty and nutritious. They are easy to store because they are lightweight and take up very little space. Compared to other preservation methods, there is minimal preparation and much less energy usage. Dried foods are high in fiber and carbohydrates and low in fat. The only danger of spoilage is mold that occurs when foods are not completely dried or come in contact with moisture during storage. And, as with all things homemade, you get to control the salt, sugar and other seasonings in enhanced products such as jerky and fruit leathers.
Fruits can be dried outdoors, but only under certain conditions. It must be hot, dry and breezy. For most of us, that is not an option. Indoors, a food dehydrator is recommended and the most convenient method of drying. There are many types on the market in varying price ranges. Convection ovens with fans can also be used, providing the oven has a setting of 140° F. Conventional ovens need the same setting and special treatment to circulate air. Microwaves are recommended only for herbs since adequate air circulation is not possible. Most user manuals provide instructions. Some herbs can also be hung to dry in a well-ventilated room.
Selection of foods for drying is the same as for any preservation method. Fruits should be ripe, but firm. Vegetables should be very fresh. Clean and peel as usual. Slicing foods allows the dry air to circulate and dry the surface area of the food first. Cut foods into 1/8-inch to 1/2-inch slices. The higher the water content of the food, the larger you should make the slice since they will shrink the most when the moisture has evaporated. Optional pretreatments include dipping, blanching, cooking, or candying.

No matter where I take my guests, it seems they like my kitchen best.
Pennsylvania Dutch Saying
This site may not be reproduced in whole or in part without written permission and appropriate credit given. Written, designed and maintained by Teri Ranck Foster. All rights reserved. Copyright Statement, Privacy Policy and Disclaimers.